Tuesday, May 1, 2012

Nursery Furniture

About two months ago I had a nervous realization that our baby was due in the not too distant future.  While I’d thought about the nursery quite a bit, I hadn’t yet started putting anything together.  I knew that before I could put together the nursery, all of my sewing and craft stuff would have to be relocated, and I was not looking forward to doing that.  Finally I bit the bullet and dove in headfirst.  My goal was not just to move all of the random stuff I’ve collected to another room in the house, but rather to make it work better for me in the next few months, and also to make it a breeze when it’s time to pack up and move this summer.  I spent 12 hours one Saturday tearing apart the study (which we use as a backup pantry and store other random things), our front hall closet (which I’d been dumping stuff in for a year and a half and slamming the door shut to keep stuff from falling out), and the sewing room.  I also had to move around furniture (and by that I mean I sweetly asked Dylan and another friend to move it all, because it’s time I took advantage of being awkwardly seven months pregnant).

Our nursery has been put together with furniture more cheaply than I could have hoped for.  Last summer I saw a dresser I liked the shape of at our local Salvation Army, but held back on buying it because it cost so much (ha! try $15).  But without Dylan’s approval, I didn’t want to buy it.  I told him about it and he went by after work.  Somehow it was still there!  Decent furniture at this Salvation Army usually sells really quickly, so we were surprised.  He liked it, bought it, and we picked it up the next day.  We actually found a stamp inside a drawer telling us that it was made by a company that usually sells dressers of this size for over $1000!

Other than giving the dresser a loving home, I didn’t put it to much use for awhile.  Finally, when I had oil-based primer out when Amy and I tackled the study, I gave it a coat as well, because I knew I’d be painting it.  We love wood finishes, but this one was a bit too rough around the edges for that, especially with the way the drawers were put together.  I was NOT going to sand that down!  After priming it, we stashed it in our guest room for 6 months and covered it with some fabric (to hide the fact that it was only primed).  I wasn’t sure at the time what color I wanted to paint it, so instead of putting in time and effort to paint it only to change my mind later, I hid it until we needed it.

When I realized that I needed to get my rear in gear on the nursery, I had Dylan and a friend carry  it back downstairs to the garage so I could paint it.  I had decided to spray paint it a glossy white, the same as the crib.  This part actually took a lot longer than I’d hoped.  In the end I wished that I hadn’t primed it with a brush, because it left so many stroke marks I had to sand it down and prime it with a spray oil-based primer.  After that, I gave it about four coats of spray paint, let it cure for several days, then we (of course I mean Dylan and a friend) carried it back upstairs to the nursery.  Here's the finished product:

Now on to the crib...We like us a good deal, and I’d say this crib definitely qualifies as one.  Where did we get it?  A dumpster.  Yep, that’s right.  We saw it in a dumpster, and checked it out.  It was a Jenny Lind style, solid wood frame, without water damage from being outside, in overall good shape.  We quickly stashed it in the car and gave it a new home.

While the cost so far was $0, this crib cost us in labor.  We had to sand down each side, as the polyurethane was chipping off (maybe from age, possibly from being outside).  This would have been a piece of cake if it was a different style, but with all of the curves this one had, it was no quick task.  Thankfully Dylan helped out with the sanding, and a few episodes of Parks and Recreation later, we had it ready to be wiped down and painted.

I used Rustoleum spray primer and the same white spray paint as I’d used on the dresser.  I’m not going to lie…it took a lot of paint.  Each spindle had to be hit from 3-4 four different directions to get it fully covered, and the whole crib needed several coats.  But since the crib was free, we felt like this was worth it.  I'm looking classy in the picture below, eh?

We did have to make a couple of trips to the hardware store to figure out how to attach the front part of the crib.  Needless to say, dumpster cribs do not come with hardware.  In the end we used four L-brackets, for a total of 8 bolts attaching the front to the sides, instead of the only 4 that had been previously used.  It’s not going anywhere.  I spray painted over the hardware to make it blend in.

At this point, the crib was done, except for the fact that we didn’t have a mattress support frame.  I’d kept my eyes open at thrift stores and Craigslist ever since we found the crib in December, but hadn’t seen a single thing.  So I looked it up online and was prepared to make my own from 2x2s and 1x3 slats when I got home from school one day.  On a whim I stopped by the Salvation Army on my way home.  After two months of no cribs, they had two!  One of them was broken, so they weren’t going to be able to sell it, which means that I got the steel mattress support for only $2!

The third main piece of furniture in the nursery is a side table.  This I just made this past weekend (yep, 38 weeks pregnant...).  As I was cleaning up the house, I noticed a couple of drawers we'd removed from our kitchen three years ago in the renovations.  I hate seeing perfectly good things just sitting around going to waste, so immediately my mind went to how I could use them.  As the nursery has taken shape I've been really happy with it, but it needed a side table.  Not wanting to spend money on one (and not seeing one around town that I liked anyway), I decided to build one.

I modeled it after Ana White's Simple Nightstand (I made two of these as my first building projects two years ago), but adjusted it to have two drawers instead of one.  The side table I made ended up the same height, but had a much larger base, which I like.  I used scrap materials on this side table.  The only items I had Dylan buy were two 8-foot 1x2 furring strips (cheaper than pine 1x2s, found in the lumberyard at Home Depot), for a grand total of $.85 each.  Other than those, I used 1x3s, 3/4-in plywood, and beadboard leftover from re-facing our kitchen cabinets, all of which we had on hand.  I spent about 5 hours on Saturday coming up with the adjusted measurements and building the side table.  On Sunday I filled the holes and cracks with wood filler, then on Monday after sanding everything smooth, I spray primed and painted it outside with the same paint I used on the dresser and crib.

I certainly was not the perfectionist on this project that I've been on every other building project, but it's not anything people would notice.  Just things I usually wouldn't be able to let slide.  Tuesday Dylan carried the side table up to the nursery, and I was able to finish putting everything together in there.

The other pieces of furniture in the nursery are a twin bed (left in our house from Dylan's former roommate) and an awesome rocking chair I bought in Costa Rica when I studied abroad there in college.  It's not actually in the nursery yet, because it's Dylan's favorite chair to play video games, but he knows that as soon as the baby gets here, it'll be moved.  I've always planned to use it in a nursery someday, and now I actually am!

I plan on writing a post soon about the sewing projects I undertook for this nursery, and I'll include some finished nursery pictures!

Cost breakdown of nursery furniture:
  • Dresser                              $15
  • Crib                                   Free
  • Crib Hardware                  $5
  • Mattress support                $2
  • Side table supplies             $2
  • Spray primer and paint      $50
  • Labor                                 Free
Total Cost:                                 $74


*NOTE: I realize a pregnant woman spray painting causes many people to cringe (and probably judge).  Just be assured that the garage door was opened so that the fumes could escape and my husband bought me a special mask that I wore when painting.  I felt like Darth Vader the whole time, but it’s worth it so that my baby girl doesn’t have two heads!

Wednesday, April 25, 2012

Patio Concrete Stain

Early last summer I saw a project on Beneath My Heart about staining their concrete patio.  It transformed the plain concrete patio into something beautiful!  In my head, I started secretly planning to do the same thing to our concrete patio.

Our patio has come a long way since we moved in.
Here’s what went down:
  • we tore down the ugly screens
  • we power-washed the chipped paint off the ceiling
  • Dylan replaced every two 2x4 supports with a single 4x4 post
  • Dylan tore off the old flat shingled roof and replaced it with a pitched tin roof
  • we primed and painted the ceiling and posts (with the help of friends)
  • we cut down an ugly evergreen shrub/tree and improved the landscaping

After all of that, the patio was already looking much better than when we started, but I felt like staining the concrete would take it to the next level.  My parents and sister Amy were planning on visiting us during a weekend in August, so we decided to work on it that weekend.  First I swept off the concrete and scrubbed it with muriatic acid and a hard bristle brush.  I was extra careful in this step, because muriatic acid is some nasty stuff!  Don't you just love my nerdy protective goggles?
The next morning we used a carpenter’s square and tape measures to mark off 18 inch square “tiles” on a diagonal pattern.  After I’d gotten several lines marked off, my mom and Amy started taping off the tiles with ½ inch masking tape.
Note: ½ inch masking tape isn’t easy to find…fortunately I found a place in St. Louis on their route that sold it, so they picked it up on the way.  I didn’t want to use standard ¾ inch tape, because it would make the taped off portion (the grout lines) too wide.

This part took awhile, but we were already getting an idea of what the finished product would look like, which was exciting!
And, of course, we did all of that under the supervision of the cutest kitten in the world.
In the next step, we hit a glitch.  In the blog tutorial on Beneath My Heart, she found her concrete stain at Lowe’s, and they had several options for the color of stain.  Because I live in a tiny town, our only option was Home Depot.  While usually I like it just as well or better than its counterpart, Home Depot didn’t have many options for concrete stain.  We were hoping for a brown-ish gray color that would coordinate with the tin roof, which was called "Burnished Slate."
After seeing the limited options (most were too red) and discussing it with the paint counter pro, we decided to use the jet black stain at 30% of the power (hoping it’d give us a gray color).  However, when we got home, for some reason the “black” looked decidedly blue, which was not the look we were going for.  We were able to return it and get our money back.  At this point, we decided to go with some semi-transparent concrete stain at Walmart, in the color “Brownstone" of the Seal-Krete brand, and add some blacking to it, which we purchased a bottle of at Home Depot.  This way we were able to get more of a color we wanted, with the only down side being that adding the blacking meant that the stain was no longer semi-transparent, but rather opaque.
We started rolling it on, and loved the way it was looking!  After all of the time-consuming cleaning, measuring, and taping, this part flew by!
However, as always seems to happen, we ran out with only a few square feet to go.  Bummer.
The coverage wasn't perfect, though, and there were a few places that stroke marks were visible, so a second coat wasn’t the worst thing.  Back at Walmart, we bought another gallon of stain and took it home to mix up our custom color.  As the patio needed more dry time, and we’d been at it all day, measuring, taping, and finally staining, we decided to do the second coat the following day.
Sunday after church we got busy staining, and this time around it went very quickly.  As the stain dried we carefully tip-toed around the patio and peeled off the masking tap.  Fortunately we didn’t have to deal with the tape peeling off the stain like sometimes happens with paint.  The family headed back to St. Louis shortly after, and Dylan helped me put on three coats of clear, glossy concrete sealer later that night.  One gallon was enough for all three coats!  The concrete sealer goes on milky white, but dries clear.
Finally the next day we were able to see the finished product in the daylight.  It looks like real tile!  We had a few friends over and they commented on how great it looked, and were taken aback when I told them that we’d stained it.
One of the greatest things about this project is how inexpensive a transformation it was!  Here's an estimated cost breakdown (because by now, I've forgotten the specifics!):
  • muriatic acid: $8
  • stiff bristle brush: $5
  • rubber gloves: free (already had)
  • 1/2 masking tape: $5 for 3 rolls
  • concrete stain (2 gallons): $50
  • blacking: $5
  • concrete sealer: $25
Grand total: About $100.

Not bad at all!

Friday, April 6, 2012

Duvet Cover Sewing Project

In preparation for the baby's arrival (the due date is 4 weeks from today!), we've been rearranging some furniture around here, which has thrown off some of the color schemes.  When we moved the twin bed into the nursery, we had a navy blue comforter amidst the gray, golden yellow, and dark turquoise color scheme, which bugged me every time I walked in the room.

Fortunately, we have an extra twin-sized comforter that is nice and fluffy, but we weren't using because not only did the the color clash, but the fabric was discolored in some places.  As we've been trying to stop spending money on home decor for this house, buying a new duvet cover or comforter wasn't an option.  I've been sewing a lot lately and decided to sew a duvet cover that would match the room.

However, finding fabric wide enough for a duvet cover (without piecing it together) is not easy.  Not to mention trying to do this as cheaply as possible.  I found a plain gray twin-sized sheet set at Walmart for only $10, and though I knew I'd have a tight fit as the dimensions wouldn't give me any breathing room, I decided to try to make it work.  In retrospect, the hardest part of this whole project was working with the twin-sized sheets...it would have definitely been easier to buy a sheet set that was a size larger, but Walmart was out of full-sized, and the queen-sized added another $10 to the price.

Sewing a duvet cover is not a hard task (there are plenty of people that have already written great, easy to follow tutorials online), but I didn't just want to use the sheets as they were, because I thought it'd look like a cheap giant pillow case.  After looking up ideas online, I settled on the idea of using pintucks to add visual interest (and distract from the fact that it was made out of cheap bed sheets).

The width of a standard twin comforter is 63" and the width of the flat sheet (after pre-washing) was 61".  With 1/2 inch seam allowances, the duvet cover would be about 3 inches too small.  This wasn't really a drawback, though, because it would give the comforter a little more body instead of seeming flat around the edges.

After ripping the seam along the top edge of the sheet, I had about 12 inches of extra vertical length to use to make my tufts.  I followed a tutorial I found online to make the pintucks, arranging them about 12 inches apart in each row, with rows spaced 6 inches apart.  I laid the sheet out on the living room floor for this step, and it should be noted I do not recommend this project for women who are 8 months pregnant. :)  After marking the location of each pintuck with safety pins, I started sewing the pintucks.  I expected this part to take forever, but it actually went faster than measuring and marking the locations.

Finally I was ready to actually assemble the duvet cover!  This part when quickly compared to the rest of the project.  I lined up the edges of the top and bottom piece (the bottom piece was the fitted sheet with the elastic taken out and extra material sewn together to make it a perfect rectangle, but as it won't show, that didn't bother me), with right sides together.  I sewed around three sides of the duvet cover, leaving the middle of the bottom edge open (to make the corners crisp on this fourth side, I recommend sewing about 8-10 inches on each side).  I used pearl head snaps on the bottom edge, as they were easy to attach and look nice with the gray color.
Dylan helped me slide the duvet cover on the comforter, and after a bit of adjustment, I laid it out on the floor so I could see if all of the time and effort was worth it.  The verdict?  I love it.  100%.
I left it laid out on the living room floor for a couple of days and smiled every time I saw it.  Even after I finally put it on the bed in the nursery, I walk by the room and get excited just looking at it!  It definitely doesn't look like two cheap twin sheets sewn together (as I think it might have if I hadn't added the pintucks), and I know we'll want to keep it for use in our next house.


Thursday, July 21, 2011

DIY Stencil Tutorial

As you can probably tell, there is no rhyme or reason for my blog posts at this point...no schedule, posts are anachronistic (yep, I learned that one this summer with my students in our ACT word of the day challenge.  Go ahead, look it up.  You know you want to.) and chosen by no apparent theme.  But that's life right now, being torn in 80 directions because I have so many things I'm interested and would love to do or make, but not enough time in the day to make it happen.  Instead I end up with partially finished projects, before I get too busy or distracted by something else.  Tomorrow is the last day of my summer job, which means that I'll have four full weeks off before school starts.  Even with our vacation and weddings to attend, I should be able to have relaxation time AND project time!  My plan for August is to finish lots of projects.  Finishing should be the best part, right?  Those little touches that take it from decent to great?  Like filling nail holes, caulking and painting baseboards?  Too bad that by the time I get to that point I'm sick of the project.  But, back to my goal:  finish.

For today, however, I simply browsed through iPhoto and found a project I have pictures of, but haven't written about yet.  The lucky winner?  Stencils!

Almost two years ago, right after Dylan bought this house, I made window coverings on my new (well, new to me, but handed down from my grandmother) sewing machine.  I had some experience sewing, but had never tried to make a roman shade before.  I looked up several tutorials, and the dining room window was the first one to be given it's very own, custom-made roman shade (say it out loud...it rhymes!).  But after making three more for the living room and one for a bathroom, my first efforts were no longer something I was impressed by.  Over time my method improved, my measurements became more precise and accurate, and I developed a different way of creating a roman shade.  Unfortunately, that is not what this post is about (because I totally forgot to take pictures!).  This post is about how I took $1.50/yd white fabric from Walmart and made a geometric patterned roman shade.


Materials/tools:
  • plastic pocket folder (don't get the 3 prong kind)
  • craft paint
  • cheap craft roller (mine was $.50 at Walmart and has helped on two projects)
  • time and patience
  • spray adhesive (I used the Elmer's brand)
  • pattern for stencil
  • exacto knife
  • plastic cutting board
First I found a few patterns online that I liked and printed them off at a size I thought would be good.  I cut off the pockets on the plastic folder, laid it out flat, and used packing tape on both sides to cover the holes.  I taped the pattern to the plastic, and used an exacto knife to cut out the stencil.  I didn't take pictures the first time around when I made the Moroccan pattern for the curtain, so some of the pictures below show a zig-zag stencil I made later.  A bit of advice before you begin cutting:
  1. Make sure you think through your design what part will be painted and whatnot because you may need to leave connectors strips that you'll later have to paint in with a paintbrush.  In the example below (the second stencil I made) I ended up cutting out about half of the connector pieces because the stencil was strong enough without, but I wanted to make sure.
  2. Before putting the blade to the folder, "x" out the area's that you want to cut out, because it's much easier to do this at the beginning than later when you're in the midst of your project and realize that you've screwed up.
  3. Leave at least an inch or two around the border, or you may have to tape around the edge to keep your stencil together.
Once your stencil is cut out, you are ready to start painting!  I did this the next day, because as much fun as I had on this project, it did take some time.  I bought a large bottle of brown craft paint (I don't remember the name) at Walmart and a smaller white bottle, because I wanted it a bit lighter.  I had to mix paint several times, and just guessed at the ratio, but I think it turned out looking pretty consistent.  I mixed the paint on a paper plate, gave the back of the stencil a quick spray with the Elmer's adhesive spray (put newspapers below to protect from over-spray and be warned that this is stinky stuff!), stuck it to the middle of the curtain (I made it ahead of time so that the thread and everything would be painted for a seamless look), and used my roller to lightly roll over the stencil.  I was really careful the first time around, but I quickly learned that the stencil and spray glue combination was tough against the fabric bleeding under, so I could just go to town rolling.  The few places this occurred I just blended it in with an artist's paint brush we had on hand.
When I had to move the stencil I gave it a couple of minutes to dry before I moved it and rolled again, but I was kept busy painting in the areas that I had to leave for the structural integrity of the stencil but really wanted to be painted.  It didn't take long and it was actually very soothing to be working with my hands.  It didn't hurt that I was also watching the BBC version of Pride and Prejudice (for probably the 15th time, at least).
As you can see, the outcome wasn't perfect, so if you're super obsessed, this may not be the route for you.  As much as I like perfection and staying inside the lines, it's the imperfect parts of this shade that make me like it more, because I made it from scratch and it has more personality than if I had used store-bought shade or even store-bought facbric (well, store-bought pattern, I guess...I certainly did not make the fabric!).

I let it dry overnight, and the following day inserted the dowel rods into the pockets I had sewn into the back before stenciling, stapled it to the 1x2 board, and screwed it into the wall.  While it can be a bit over powering when the shade is down (we have huge windows!), I still like it, and it's usually up anyway.  Here's a finished picture (sorry for the low quality.  These pics are all old...since taking these, I made up my mind that I was going to become decent at photography, so I'm slowly stepping up my game, turning off the flash, and turning it to manual mode).
Do you see how great the pattern looks when the blind it up?  It is perfectly centered!  Lucky coincidence.  I doubt I could have done that if I'd tried!  It's been several months since this project, and I still feel good every time I see my new shade!  Maybe I'll have to do a tutorial on making roman shades soon...

Tuesday, May 31, 2011

Busy Weekend!


Whew!  What a great long weekend!  I wish every weekend we had three days off.
I realize it's been awhile since I posted, but I'm caught up in that beginning of summer flurry of activity.  In the past four days I've:
  • played sand volleyball three times
  • stained (times 2) the two side tables I've been working on
  • polyurethaned (times 4) the side tables
  • had a lazy Sunday (didn't wake up in the late afternoon though...well, I guess I did from my nap)
  • helped Dylan install hardwood flooring (we're through the kitchen and the end is in sight!  Photos coming soon.)
  • celebrated our 1 year anniversary!
  • weeded the raised beds so I can finally put in all of the awesome plants that are dying for real soil
  • cleaned the inside and outside of our house
  • hosted a bbq, complete with almost any yard game you can think of, two cute baby chicks, cuter babies and kids, and friends
Needless to say, it was a productive but fun weekend!  Hopefully soon I'll get my booty in gear and get some pictures up.  I think I've been procrastinating on "now" pictures because our house is in the middle of a couple large-ish projects and everything is kind of a mess.  Guess that's how it goes with DIY home projects, though!

Saturday, May 21, 2011

Lamp Redo

Today I'm going to share a project I did last fall.  I almost always forget to take before or during pictures when I get into a project, but for once with this project, I remembered!

Last summer and fall were full of not only home improvement projects, but trying to decorate a large house on a dime.  I had been looking for matching bedside lamps for our guest room to replace the mis-matched and undersized lamps I had put there as placeholders.  I didn't really want to spend much money, though, especially on a room that is rarely seen.  One day as I was walking through Salvation Army, I came upon two of these babies, for just $1.99 each.  Sold!
Even though they were outdated and not my style in their current form, I already had an idea brewing.  One, spray paint the base of the lamp.  For sure.  Two, was there any way of turning the long, ugly shade into more of a modern drum shade? I know I could have bought a new drum shade at Target, but at $20 a pop, I wasn't ready to spend that kind of money on our guest room...and that didn't even include lamps.  A month or so before this project I had picked up some fabric at Joann's (I have no idea on the name or cost), which would work great for this project and tie in the colors I'd decided to use in this room.

Unfortunately, this is the part where I forgot to take pictures of the process of transforming the shades, but basically it went something like this:
  1. Measure 11 inches from the top of the shade and use a utility knife to score through the shade all the way around.
  2. Tear the metal band off of the former bottom edge of the shade (now cut off) and hot glue it to the new bottom edge of the shade.
  3. Cut fabric to size for the shade.  Since the shade wasn't perfectly cylindrical, I used some craft paper to first make a pattern, which I then copied onto the fabric.  I knew the width of the fabric would be really close to the amount I'd need to go all of the way around the lamp, but because of the pattern, I was able to save a lot of fabric from the trash can that I know would have ended up there had I guessed.
  4. I hot glued one edge of the fabric to the lamp to make sure it didn't move, then used Elmer's spray adhesive to secure the fabric all of the way around the shade.  To close off with a nice seam, I turned under the fabric before gluing.
At this point, I had this shorter drum shade.
To finish off the edges, I bought some wide bias tape and hot glued it around the top and bottom of the shade.  After spray painting the base with Rustoleum paint I had on hand, I was left with two newer looking lamps.
Sure, it involved more time than buying shades at Target would have required, but I like the colors and pattern of the fabric on the shades, not to mention that every time I look at these lamps, I get that happy I-did-that-myself feeling.  Total cost? $4 for both lamps and shades, $6 for fabric, $0 for spray paint (we had it), $2 for bias tape.  That makes it $6 for each lamp!  Not bad, not bad.

Monday, May 16, 2011

Fine Line House Tour: Part 1

Before pictures are always a good place to start, right?  In the first post, I showed you a picture of the outside of our house.  While it looked great from the outside, the inside was another story.  It's  therapeutic for me to look back through these pictures.  Sometimes it's easy to get caught up in how many things there are left to do and forget how far you've come. 

Back to the tour.  Here's the outside of the house when Dylan bought it back in the summer of 2009.  Despite the overgrown bushes and the evergreen trees that were planted too close to the house, it looked nice.
Now for the inside.  Entering the house from the side door (on the right in the picture above), you enter the breakfast nook.  Back then, the breakfast nook was a definite contender for the most disgusting room in the house.  Old, stained carpet, tons of shutters on the windows, outdated and faded wallpaper, drop ceiling, office-building fluorescent lighting...there was so much going wrong in there.  In the picture below you can see the side door on the left.
Walking straight in the side door and crossing the breakfast nook would get you into the dining room.  I couldn't find any true before pictures, but this one is pretty close to a before picture, aside from the wallpaper that we had already torn off.  This picture was taken from the doorway that leads to the kitchen.
This kitchen has been the bane of our existence, but we'll get into that more later.  For now, let me just point out the carpet.  Who puts carpet in a kitchen?  I'm certainly not a clean enough cook to be able to keep a kitchen carpet nice!
Walking down the hallway from the kitchen we pass the 1/2 bath, which is small, only barely enough room for a toilet and sink.
Continuing down the hallway we arrive at the study, which faces the backyard.  The study is a tiny room, only about 10x10 feet.  It could have been the green-stained wood paneling or the water-damaged ceiling, but this room felt very oppressive.
Next we come to the front entryway.  This picture was taken from the front door.  To the right there is a door that leads to the dining room, and the door on the left leads to the hallway that passes by the study and 1/2 bath and eventually arrives in the kitchen.
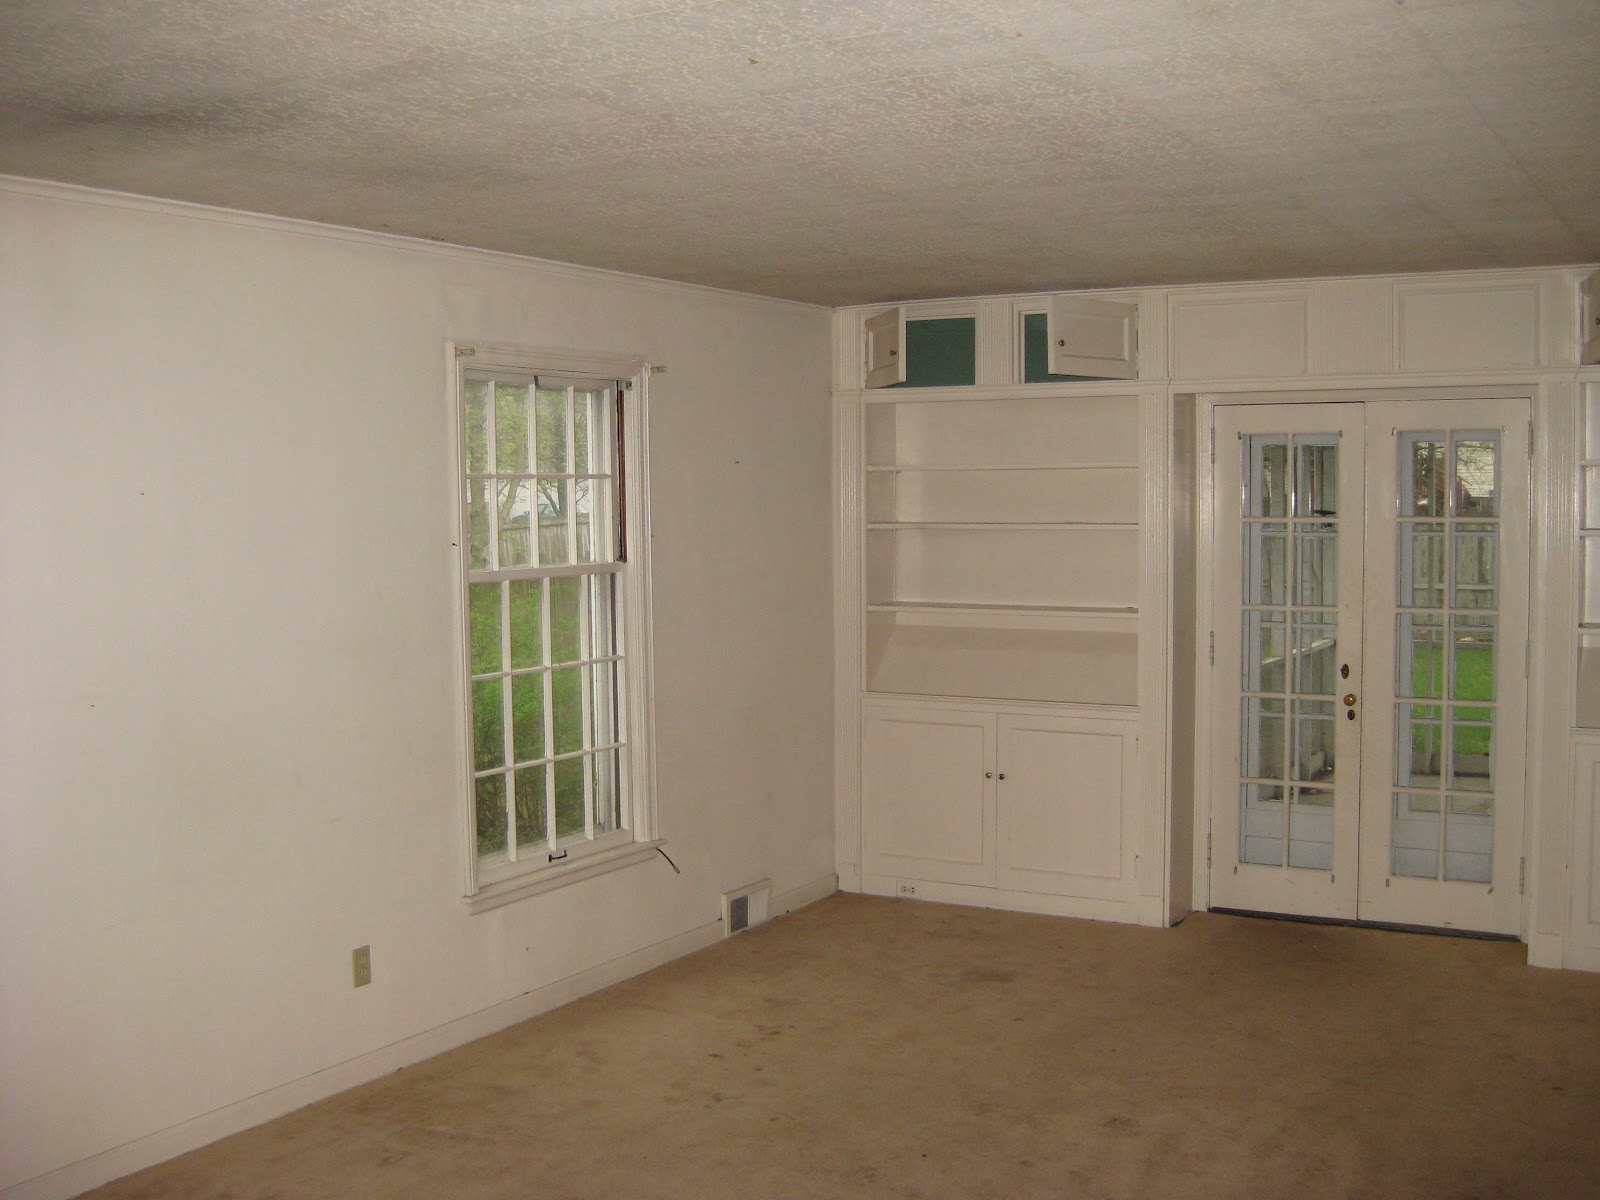
If we turned left from the entryway we would enter the living room. Aside from old stained carpet, this room was the nicest room on the first floor, in part because it had been painted instead of wallpapered, so it was a quick day project to get it where we wanted to make it liveable.
And that brings us to the end of House Tour: Part 1!  Next up is a tour of the upstairs rooms, then we'll check out the backyard, shed, and garage.

Looking at these pictures, I can't help but wonder why we went for it with this house in the first place!  It had great bones to begin with, but I don't think either of us realized just how much work it would take to bring it back to its glory days!